How to Make Voronoi Patterns with Autodesk® Meshmixer
- Gabi Marraro

- Apr 30, 2015
- 2 min read

Voronoi patters make interesting, organic looking models. You can add Voronoi patterns to an .STL or model that will import into Autodesk Meshmixer by reducing polygons and applying the Dual Edges pattern. Read more about Voronoi diagrams on Wikipedia. Download Meshmixer for free here.
Intro: Voronoi patterns consist of lines connecting points that are the centers of circles which intersect with the model's triangle mesh to create a tube like structure that replaces the original polygons. Read more here: (wiki) Delaunay triangulation. These patterns can provide consistent horizontal cross sections for slices that might be helpful when using SLA / resin 3D printers. Voronoi models can print well on most Fused Filament 3D printers. See our "little Dipper" 3D Printer post and Instructable for more Voronoi 3D prints.
Step 1: Import Model and Reduce Polygons
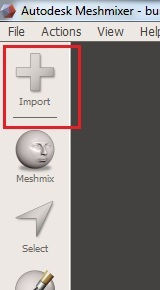
Click [Import icon] or file > Import

Select entire model using keyboard Ctrl+a or use the select tool to click and drag certain areas. Edit menu appears at top after the selection turns orange.

Click [Edit] > [Reduce] while model is highlighted.

Increase percentage slider or change drop down to lower triangle / polygon count. Less polygons result in larger openings in the final model. It may help to try a very low polygon count or high percentage. Click [Accept]
Step 2: Apply and modify Pattern
Click [Edit] menu icon > make pattern

Change drop down to [Dual Edges] (generates pattern on exterior only) or [Mesh + Delaunay Dual Edges] (generates pattern inside model). [Element Dimensions] will make thicker or narrower tubes. *Adjusting certain pattern settings may require intensive CPU usage. *After clicking accept, you may want to reduce the new mesh polygons for easier 3D printing or importing into other programs.

To save model: [File] > [export] .STL format

Comment and enjoy! Thanks! - Marshall P.


Всі ми прекрасно знаємо всю ту користь, що приносять новини в наше життя, так само ми всі користуємося тими чи іншими новинними порталами кожен день. Саме тому, так круто, що ми тут можемо поговорити і обговорити те, наскільки ефективною і якісною є робота новин. Я зі свого боку можу сказати з повною упевненістю, що завдяки новинному порталу Delo, я став набагато краще розуміти новини, пов'язані з ФОП і ММСП https://delo.ua/business/fop-ta-mmsp/, що на сьогоднішній день дуже важливий аспект нашого життя. Та й плюс, робота і працевлаштування на сьогоднішній день дуже актуальна тематика, за якою потрібно стежити, тому тут їм великий респект, що завжди висвітлюють найактуальніші і потрібні теми. Та й взагалі, друзі, я раджу звернути більше уваги на цей новинний портал,…